
How to Inspect and Reattach a Bumper with Loose Clips
Shine Auto Service · October 24, 2026
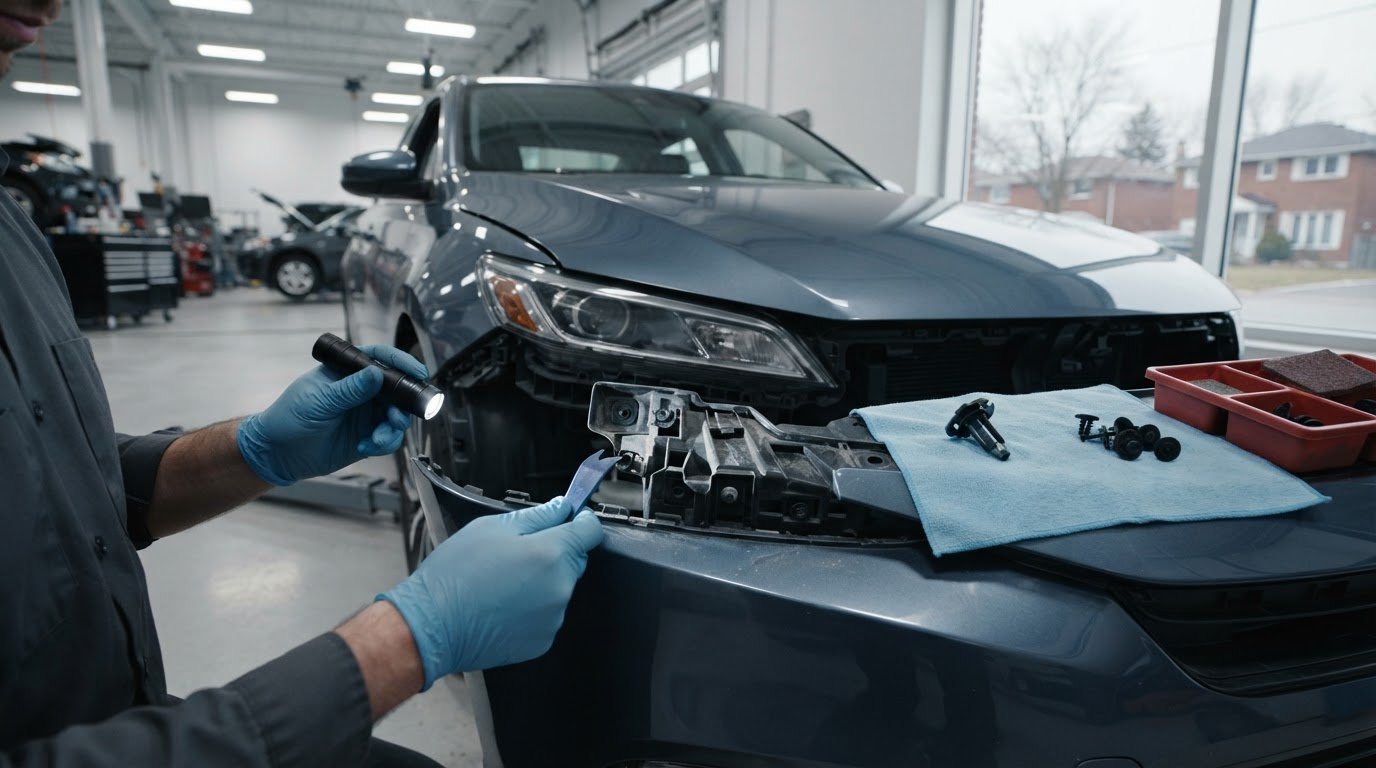
A bumper that snaps back into place isn’t necessarily secure. For loose bumper clip repair, inspect the retainers, fasteners and mounting tabs, replace damaged clips, then clean the repair surfaces before reattaching the bumper. Leave damaged clips in place and the bumper can come loose again within weeks.
A loose corner or uneven bumper gap is frustrating, especially when the cause isn’t obvious. Start by finding what failed, not by pressing the bumper back into position. This guide explains common causes, how to inspect clips and tabs, and how to clean damaged areas before removing and reattaching a front bumper. You’ll also learn when a damaged tab needs more than a clip replacement, so you can choose a practical next step and help the bumper sit securely.
Key Takeaways
- Find out whether the bumper is loose because of a failed clip, a damaged retainer or a broken mounting tab before pushing it back into place.
- Clean the damaged tab and nearby surface before repair. 3M recommends a 60-grit disc for grinding and an 80-grade abrasive disc for sanding the plastic tab area.
- Inspect each fastener and mounting point for cracks, distortion or missing pieces; replacing damaged clips helps prevent the bumper from coming loose again.
- Use the right removal tools and replacement clips for the vehicle, and keep track of fasteners as you remove and reattach the front bumper.
- When the bumper has more than a simple clip issue, bumper repair can address damage that makes a do-it-yourself refit difficult.
Table of Contents
Cleaning the damaged tab and vehicle surface
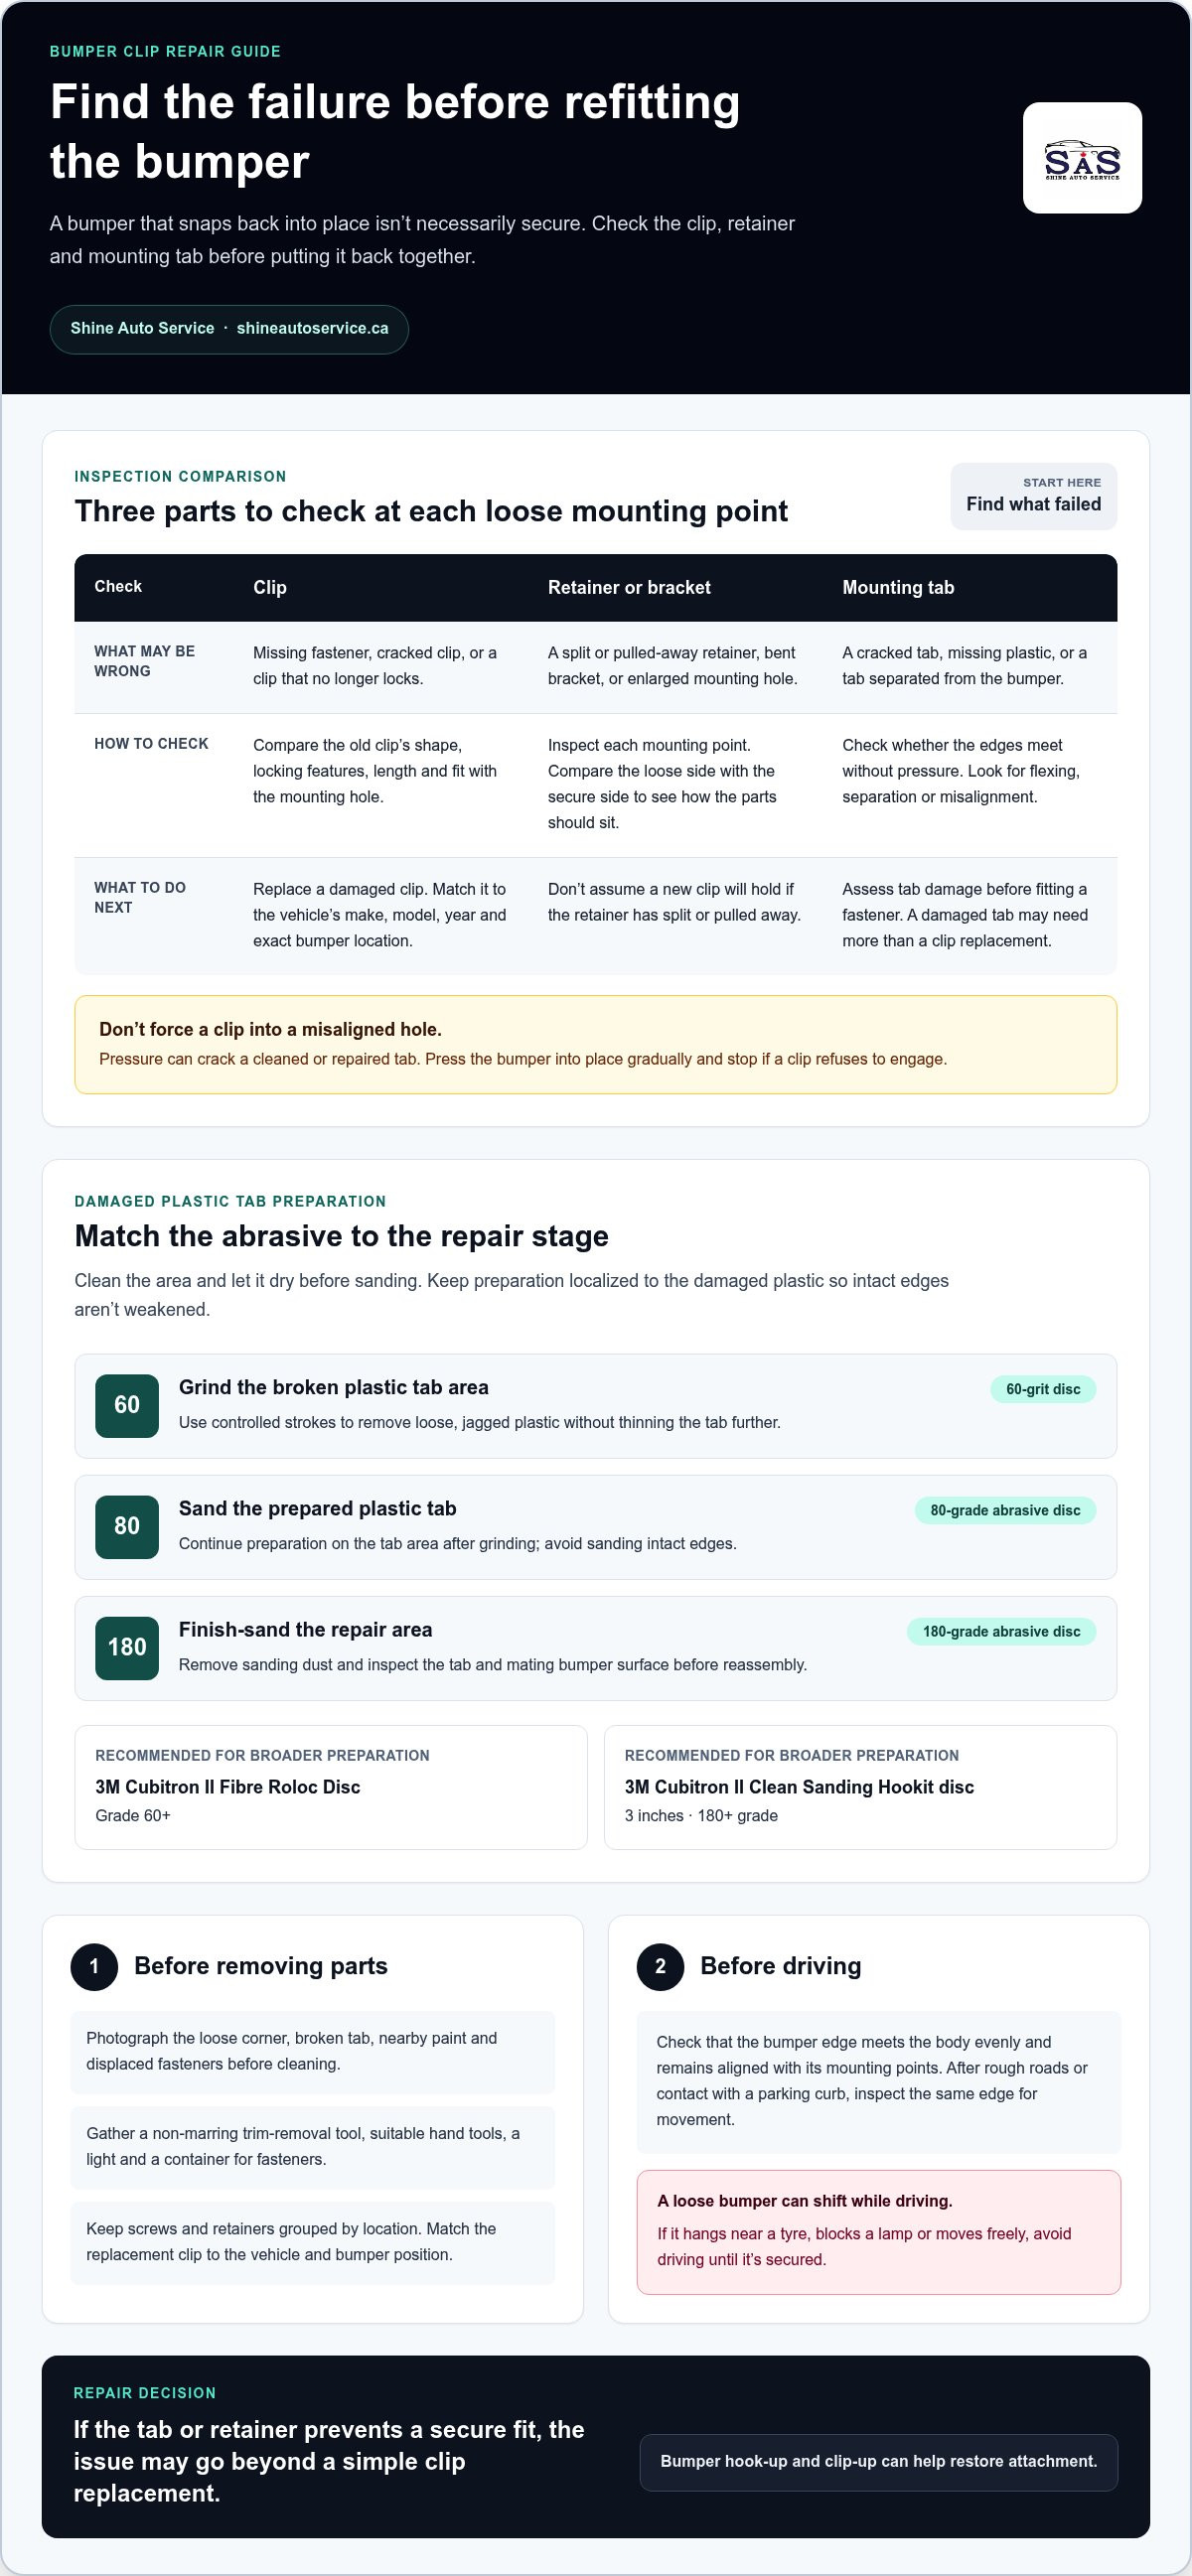
Document the damage before cleaning. Photograph the loose bumper corner, broken tab, nearby paint and displaced fasteners. A clear record helps show what changed during the repair. Loose bumper clip repair does not by itself determine warranty coverage or insurance eligibility. Those decisions depend on the applicable warranty terms or insurance policy and the circumstances of the damage, so keep your photographs and repair records together.
Remove dirt from the tab and surrounding bumper surface with a clean cloth and a suitable automotive surface cleaner, following the product label. Road film, wax and old adhesive can prevent repair materials from bonding evenly. Keep cleaner away from unmasked paint if the instructions warn against paint contact. Let the surface dry fully before sanding, as moisture and residue can collect in cracks.
Prepare only the damaged plastic area. 3M recommends grinding the broken plastic tab area with a 60-grit disc, then sanding it with an 80-grade abrasive disc. Use controlled strokes to remove loose, jagged plastic without thinning the tab further. Keep the work area localized; sanding intact edges can weaken the mount and expose more plastic than the repair needs.
Refine the repair surface before applying adhesive. 3M recommends final sanding of the plastic tab repair area with a 180-grade abrasive disc. For broader surface preparation, the recommended 3M Cubitron II Fibre Roloc Disc is Grade 60+, and the recommended 3M Cubitron II Clean Sanding Hookit disc is 3 inches in 180+ grade. Match the abrasive to the specific preparation stage rather than using one disc for every task.
Clean away sanding dust and inspect the contact area. Wipe the tab and mating bumper surface with a clean cloth, then check for remaining grease, loose plastic or adhesive residue. Don’t cover a crack or a missing section with repair material before assessing the damage. A tab that flexes, separates or no longer lines up needs attention beyond surface cleaning.
Prevent repeat damage by keeping the bumper aligned with its mounting points during reattachment. Don’t force a clip into a misaligned hole, as pressure can crack a cleaned or repaired tab. Check that the bumper edge meets the body evenly, and avoid pulling or leaning on that corner when loading the vehicle. After driving over rough roads or contacting a parking curb, inspect the same edge for movement.
Inspecting retainers, fasteners, and broken tabs
Inspect each mounting point before deciding whether a clip, retainer or plastic tab needs repair. Find a matching replacement using the vehicle’s make, model, year and bumper position.
Check the bumper edge and each retainer in sequence. Look for missing fasteners, cracked plastic, bent brackets, enlarged holes and clips that no longer lock. Compare the loose side with the secure side to see how matching parts should sit. A clip may be intact but unable to hold if its retainer has split or pulled away.
Identify the required tools and clipsGather a trim-removal tool, suitable hand tools, a light and a container for removed fasteners. Choose a non-marring trim tool to reduce the chance of scratching painted surfaces when releasing clips. Keep each screw and retainer grouped by location. Don’t force a fastener with a mismatched driver; a damaged head makes removal harder and can obscure the original fit.
Find the correct bumper clipMatch the replacement to the vehicle’s make, model, year and exact bumper location. Compare the old clip’s shape, locking features, length and fit with the mounting hole. Front bumpers can use different retainers along the top edge, wheel arch and lower edge. Don’t rely on colour or a close visual resemblance alone; a poorly seated clip can leave the bumper loose.
Assess broken tabs before fitting a new fastener. Check whether the tab is cracked, missing material, or separated from the bumper, then see whether its edges meet without pressure. For a tab repair, 3M recommends drilling 1/8-inch pinning holes about ¼ inch within the tapered area, spaced ¼ inch apart. Those measurements describe the repair layout, not a reason to drill an intact tab.
Finish with an even surface and a close inspection. 3M recommends final sanding of the plastic tab repair area with a 180-grade abrasive disc. Remove dust, then check the tab’s edges, pinning holes, and contact surface for loose fragments or uneven spots. Refit the retainer only after the tab is stable and aligned. Press the bumper into place gradually; stop if a clip refuses to engage.
If a broken tab or damaged retainer prevents a secure fit, bumper hook-up and clip-up can help restore the bumper’s attachment.
Common causes of loose bumper clips and brackets
Trace the looseness to its cause before deciding what needs repair. A clip may have failed, or an impact may have damaged the bumper tab, retainer or bracket.
A loose bumper can shift while driving, so don’t treat a sagging edge as a cosmetic issue only. If it hangs near a tire, blocks a lamp or moves freely, avoid driving until it’s secured.
Look for impact marks. Check the loose corner for scuffs, cracks and a pushed-in shape. A parking-lot bump can pull a clip from its retainer or bend the bracket behind the bumper. Compare the damage with the opposite side. A fresh scrape beside a separated seam points to contact, while an undamaged outer surface may hide a broken inner mount.
Check for curb or road contact. Inspect the bumper’s lower edge for scrapes, torn plastic and missing fasteners. Contact with a curb, snowbank or uneven driveway can catch the lower lip and tug the bumper away from its mounts. Look underneath with a light. A hanging lower bracket can put extra strain on clips farther along the bumper edge.
Look for stress around the wheel arch. Examine the bumper-to-fender seam and nearby liner. A snagged liner or loose edge can pull the bumper outward as the wheel turns or the vehicle moves over uneven pavement. Look for a liner pressing against the bumper or a clip hole stretched into an oval. Don’t force the edge back if it springs away.
Consider previous removal or repair. Check whether fasteners are missing, mismatched or sitting at different angles. A bumper removed for paint or access may loosen later if a retainer was left out or a cracked clip was reused. For example, one missing fastener near the wheel arch can leave that corner unsupported, even if the remaining clips still engage.
Inspect aged plastic and brackets. Look for brittle, whitened plastic around the clip opening, as well as rust or bending on a metal support. Plastic can crack beside a fastener when the bumper flexes, while a corroded or distorted bracket may no longer hold its original position. Check the mounting area, not just the visible bumper skin; the failed part may sit behind it.
Match the repair to the cause. Replace a broken fastener when its mounting point is sound. A cracked tab, bent bracket or torn mounting hole needs repair before another clip can hold securely. After a bump, inspect nearby mounts too. Reattaching only the obviously loose corner can leave the original strain in place and let the bumper loosen again.
Removing and reattaching a front bumper
Use the vehicle’s service information to locate fasteners and release points before starting. Support the bumper as you release clips, then replace damaged retainers before refitting.
Remove the front bumperPark on a level surface, switch off the vehicle and gather the correct hand tools. Use the vehicle’s service information to locate screws, bolts, clips and any required access panels. Remove fasteners in order, storing them by location so they return to the correct holes. Support the bumper as the last retainers come free. Pulling on one corner can crack a tab or stretch wiring.
Release the bumper gradually along its edges. Start at the loose corner and work across the wheel arch, upper edge and lower edge, following the vehicle’s release points. Use a non-marring trim tool where clips resist. Don’t pry against painted panels or twist the bumper sharply. If a connector or wiring harness is attached, disconnect it carefully before moving the bumper away.
Set the bumper on a clean, stable surface, keeping grit away from the painted side to prevent scratches. Inspect the exposed mounting points, retainers and tabs for cracks, distortion or missing sections. Compare both sides to spot a bent bracket or a fastener left behind. Remove broken clip pieces from their holes so they don’t obstruct the replacement fastener.
Reattach the front bumperReplace damaged clips and align the bumper with its mounting points before pressing it into place. Start at the centre or the vehicle’s specified alignment point, then engage the edges gradually. Reconnect any wiring before closing the gap. If a clip won’t seat, stop and check the alignment, retainer and tab rather than forcing the bumper.
Refit fasteners in their original locations and make sure each clip locks fully. Check the wheel-arch edges, grille area and lower bumper for even gaps. If damaged clips aren’t replaced, the bumper can come loose again. Finish by checking that connected lights or sensors work as intended and that no wiring is trapped behind the bumper.
Press gently along the bumper edge to check for movement, then inspect the fit from several angles. The seam should sit evenly against neighbouring body panels, with no corner springing outward. If a tab or bracket remains broken, replacement clips alone may not keep the bumper secure. Avoid driving with an unsecured bumper that shifts or hangs close to a tire.
What tools and replacement clips are needed for bumper clip repair?
Gather tools and materials that match the damaged mount, not just the visible bumper edge. The right clip, surface-preparation abrasives and repair supplies depend on whether the failure involves a fastener, retainer or broken plastic tab.
Choose hand tools that fit the fasteners. Set out the correct screwdrivers or sockets, a non-marring trim tool, a work light and a container for removed hardware. A trim tool helps release plastic retainers without gouging painted surfaces. Keep fasteners grouped by location so a lower screw doesn’t get mixed up with an upper clip.
Match each replacement clip to its mounting point. Use the vehicle’s make, model, year and bumper location to identify a replacement. Compare the old part’s shape, length, locking shoulders and fit with the hole. Front bumpers may use different clips along the grille, wheel arch and lower edge. A close-looking substitute can fail to lock or leave the seam uneven.
Select abrasives for the repair stage. For a broken plastic tab, 3M recommends a 60-grit disc for grinding, followed by an 80-grade abrasive disc for sanding. The recommended 3M Cubitron II Clean Sanding Hookit disc is 3 inches in 80+ grade. Use controlled pressure and keep the preparation on the damaged area, rather than thinning nearby plastic.
Prepare for final surface refinement. The recommended 3M Cubitron II Clean Sanding Hookit disc is 3 inches in 180+ grade. Keep abrasives clean and separate by grade; using a coarser disc at the finishing stage can leave deep scratches.
Gather compatible plastic-repair supplies when a tab is broken. The recommended 3M Super Fast Repair Adhesive comes in a 200 mL size, and the 3M Performance Manual Applicator is for 200 mL. The recommended 3M Polyolefin Adhesion Promoter is a 12-ounce aerosol. 3M recommends allowing the promoter to cure for 5 to 10 minutes before proceeding.
Set out shaping materials and follow cure times. The recommended 3M Plastic Contour Sheet measures 5 inches by 12 feet. 3M recommends cutting the contour film sheet to three times the length of the tab. It also recommends allowing applied plastic adhesive material to cure for 5 to 10 minutes. Follow the product directions for preparation and handling.
If the damaged mount needs more than replacement clips, get help with bumper hook-up and clip-up.
These comparisons can help you decide whether the repair is limited to a mount or requires broader replacement work.
Shine Auto Service: Bumper Repair
Shine Auto Service Inc repairs bumpers when clips, tabs or surrounding plastic are damaged. Its Bumper Repair service addresses bumper damage, while Bumper Hook-up/Clip-up helps reattach a loose bumper. If the same impact left visible scrapes or dents, Scratches Repair Service and Dent Repair can address those related issues.
Mobile auto body repair brings the work to your home or workplace. That’s a practical next step if the bumper shifts after refitting, a mounting tab is broken, or the damage extends beyond a replaceable clip. For help with a loose bumper clip repair, contact Shine Auto Service Inc.
Get the bumper secure and move forward
A do-it-yourself fix can reveal damage beyond a clip, such as a cracked bumper tab or scuffed paint. If loose bumper clip repair has become a larger bodywork issue, choose a next step that addresses both the damage and the fit. Shine Auto Service offers Bumper Repair, Scratches Repair Service and Rust Repair, so related body damage can be handled alongside the bumper concern.
You don’t need to keep pressing a loose corner back into place. Share what you’ve noticed and get practical help with the repair. Contact Shine Auto Service for help, and take the next step towards a bumper that looks right and sits securely.
Frequently Asked Questions
How do I reattach a loose bumper clip?
First make sure the bumper edge and clip line up without pressure. If the clip is intact, seat it squarely in its matching retainer and press until it locks. A clip that won’t engage may be the wrong shape, or its mounting point may be damaged. Avoid using tape in place of a fastener, especially if the bumper shifts near a wheel or lamp.
How can I tell if a bumper clip is broken or just popped out?
A clip that has popped out usually retains its full shape and locking edges, so it can often be repositioned in an undamaged mount. A broken clip may have a missing tip, split body or flattened locking shoulder. Compare it with a matching clip nearby. Also inspect the retainer: a sound clip cannot hold if the receiving hole or bracket has cracked.
How do I remove and install bumper clips without damaging the bumper?
Use a trim tool that fits beneath the clip head, and lift evenly rather than pulling one side sharply. For push-pin fasteners, release the centre pin before removing the outer body if that design uses one. Keep the tool away from painted edges and stop if the plastic begins to whiten or bend. During installation, align the clip with its hole before pressing it in.
Can I repair a broken bumper clip with adhesive, or should I replace it?
Replace a broken removable clip; adhesive is for repairing damaged plastic tabs, not recreating a clip’s locking shape. If the tab has cracked but remains attached, plastic repair adhesive may help restore its mounting area when applied as directed. A missing section, split retainer or distorted bracket needs a different repair. The key test is whether the fastener can lock securely into a sound mount.
How much does bumper clip repair cost in Canada?
The price depends on the damage and is provided through a quote based on its severity, required materials and repair time. A straightforward clip replacement involves different work from repairing a broken tab or removing a bumper to reach hidden retainers. When requesting an estimate for a vehicle in Durham Region, describe which corner is loose and whether you see cracks, missing fasteners or impact marks.
What does a body shop charge to replace bumper clips?
There isn’t one fixed charge for every clip replacement. The quote depends on the damage, required materials and repair time. A clip that’s easy to access involves different work from one behind a bumper that needs removal. Ask for an estimate that distinguishes clip replacement from repairs to a damaged tab or bracket.